
Shopify is one of the easiest ways to start your own online business. It’s quick to set up and you don’t need to know how to program. While you can get some sales on marketplaces like Amazon or Etsy, your own store gives you more control over your listings and branding. Shopify offers everything you need to create and grow your eCommerce store.
This Shopify tutorial consists of two parts, a collection of how-to videos that show you everything you need to start selling, and detailed written instructions that walk you through every step of the way.
Here are the steps to launch your store:
- How to Sign Up
- How to Add and Edit a Theme
- How to Add a Product
- How to Create a Collection
- How to Create Pages
- How to Edit Your Shop Menu
- How to Accept Payments
- How to Set Up Shipping
- How to Create Discounts and Sales
- How to Add a Blog
- How to Add Shopify Apps
- How To Add a Custom Domain
- How to Set Your Shop Live
What Exactly is Shopify?
Shopify is an all-in-one eCommerce platform that allows you to create your own online store without knowing how to code. The basic plan costs $29/month and should offer everything a beginner needs to start selling online. You only have to sign up, choose a template, add products and you’re ready to start selling.
Why Shopify?
Shopify is a managed platform, which means that you don’t need to get your own web server. This makes the setup easy. They allow you to accept payments through their system and make your website look good with themes. There are a ton of free and paid templates to choose from. Lastly, Shopify is fast and secure and you don’t need to worry about running regular updates.
Shopify Disadvantages
Like every platform, there are some downsides to Shopify. One of them is that you don’t have full control over your site. Completely customizing your store and its functions is a little more difficult compared to other platforms like WordPress. It’s also a bit more expensive than other platforms.
If you’d like to learn more about Shopify’s pros and cons, I wrote an article about the advantages and disadvantages of this eCommerce platform.
Step by Step Guide
In this Shopify guide, I’ll go through each step to get your store set up and running. I’ll show you how Shopify works and how you can start selling right away. The tutorial will talk about how to: sign up, add a theme, add a product, edit your menu, create collections, discounts, a blog and pages, set up your domain and shipping, and accept payments.
Step 1: How to Sign Up
Let’s take a look at how to sign up with Shopify and the layout of the Shopify dashboard.
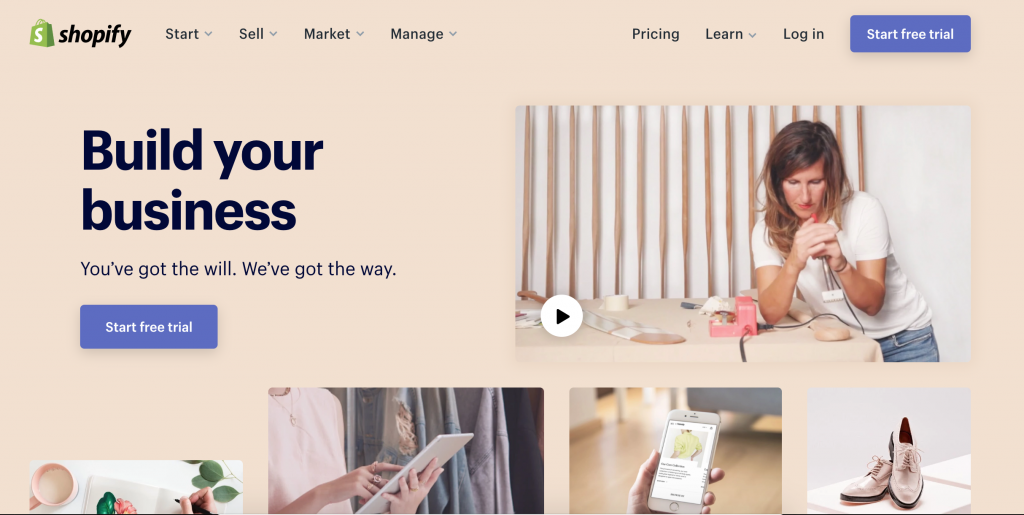
Go to Shopify and click on Start Free Trial.
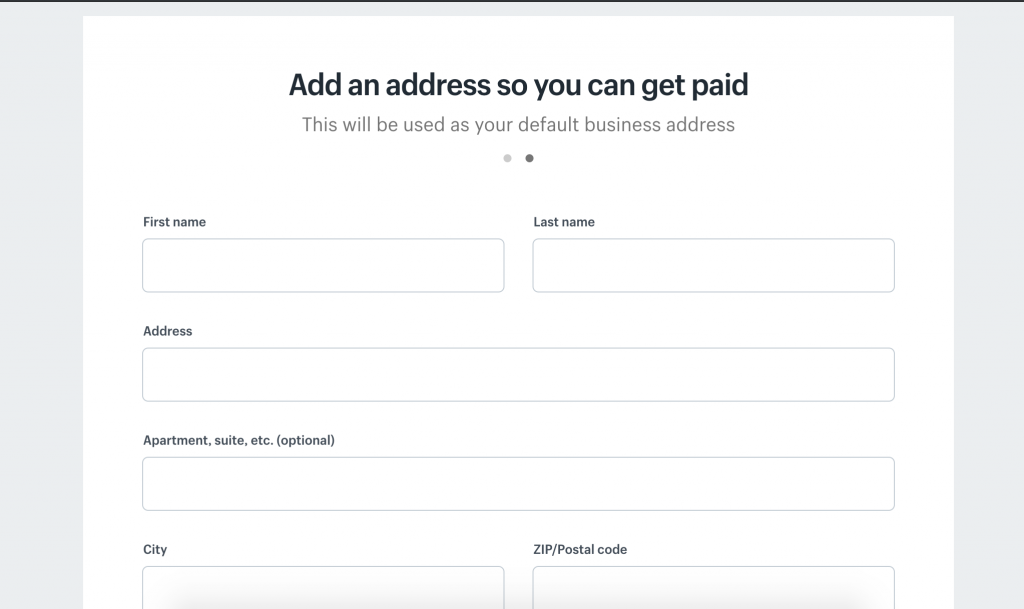
You’ll be asked to add your business name and email. Shopify also needs your address so they can help you to accurately collect sales tax later.
If you don’t have a business or personal website, you can leave this field blank.
That’s all the information needed. Shopify is now loading your store.
Shopify Home Dashboard
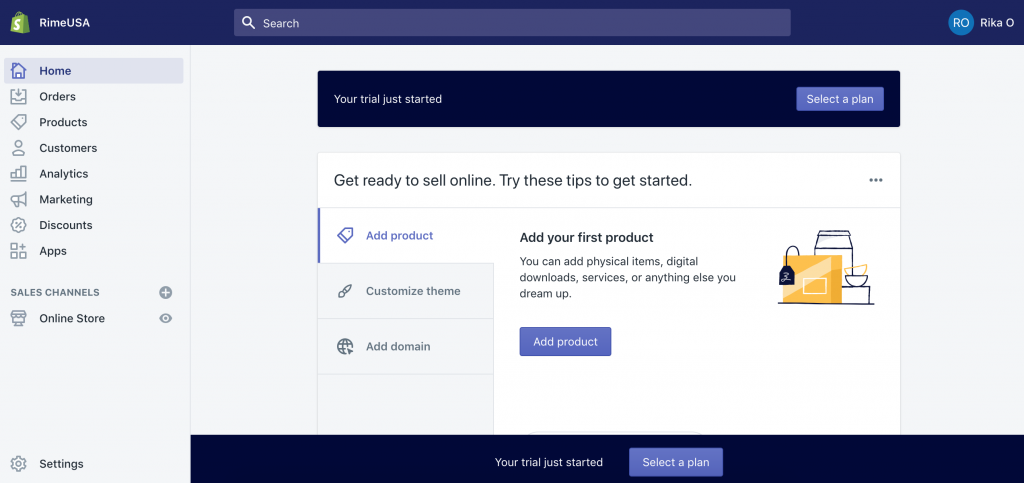
When you log into your Shopify store, you’ll see your daily sales and some analytics. Shopify will also show you activity cards reflecting anything important you need to take off.
On the left menu you’ll find:
Orders
You can look up your orders here. You can see order details, add draft orders and see abandoned checkouts.
Products
View your products under the all products tab. You can manage incoming inventory under transfers. Via the inventory tab, you can see and manage your inventory across locations. You can create collections, which are groups of products. With an advanced Shopify plan, you can also offer gift cards.
Customers
Lookup and edit your customers’ information.
Analytics
Via the analytics tab, you can see how your store is doing and generate several performance reports.
Marketing
Shopify makes it easy to launch marketing campaigns on different platforms like Google or Facebook.
Discounts
You can see and create discounts as well as sales for your store.
Apps
Browse the Shopify app store and see if there are any apps that can help you grow your business.
Sales Channels
When you click on sales channels, you can see and add additional platforms like Amazon.
Settings
Here you can find your overall store settings. You can edit things like your payment providers, staff accounts, billing, invoices, shipping, and taxes.
Step 2: How to Add and Edit a Theme
Now that you signed up with Shopify, let’s make your store look good.
Add a Theme
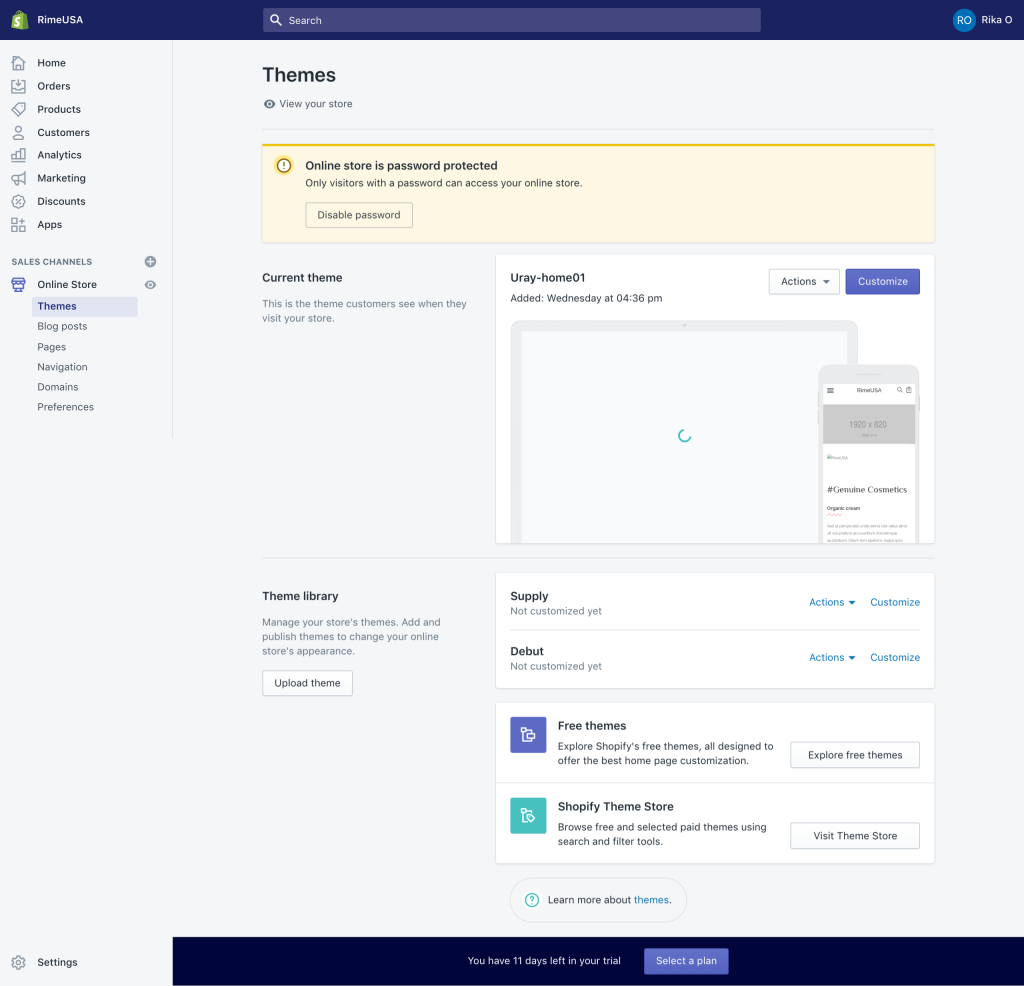
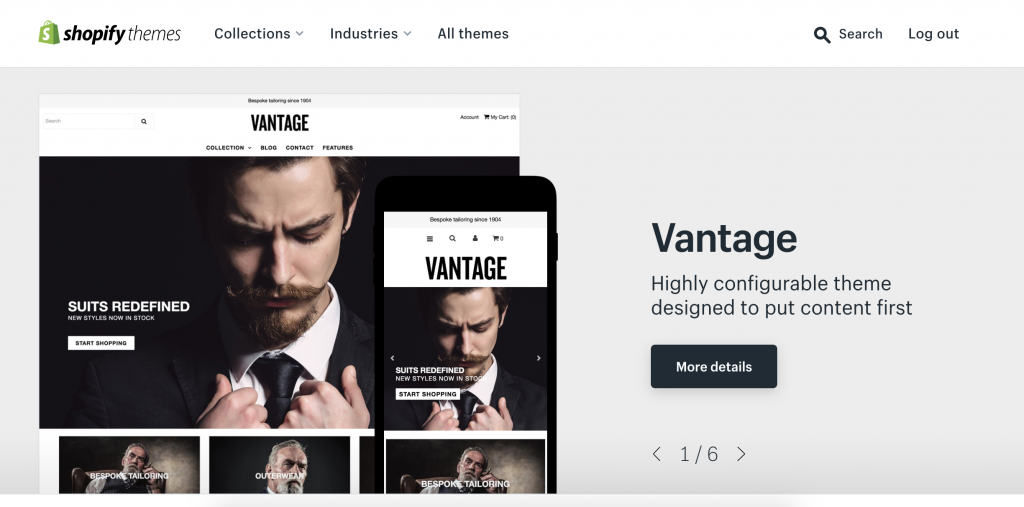
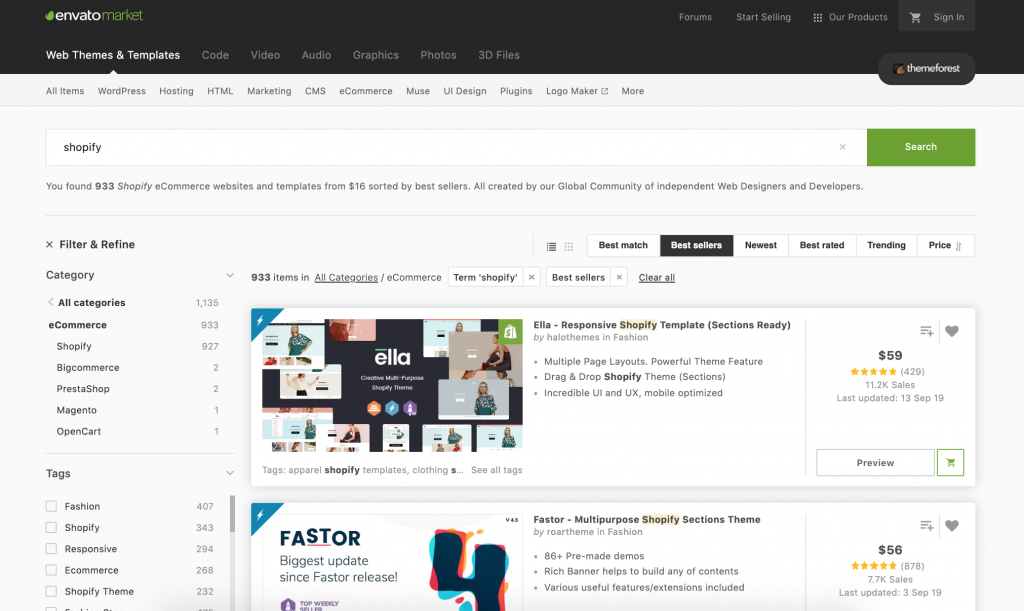
From your home, navigate to Online Store and click Themes. Scroll down to explore free themes or visit the Shopify theme store. I think it’s best to search for a theme that already looks close to what you’d imagine your store too look like. That way you don’t have to do too many edits. Check the reviews to make sure the theme works as advertised. You can get the theme from Shopify or other sites like themeforest.
Add a theme you like. Next, click on actions and publish.
How Edit the Shopify Theme
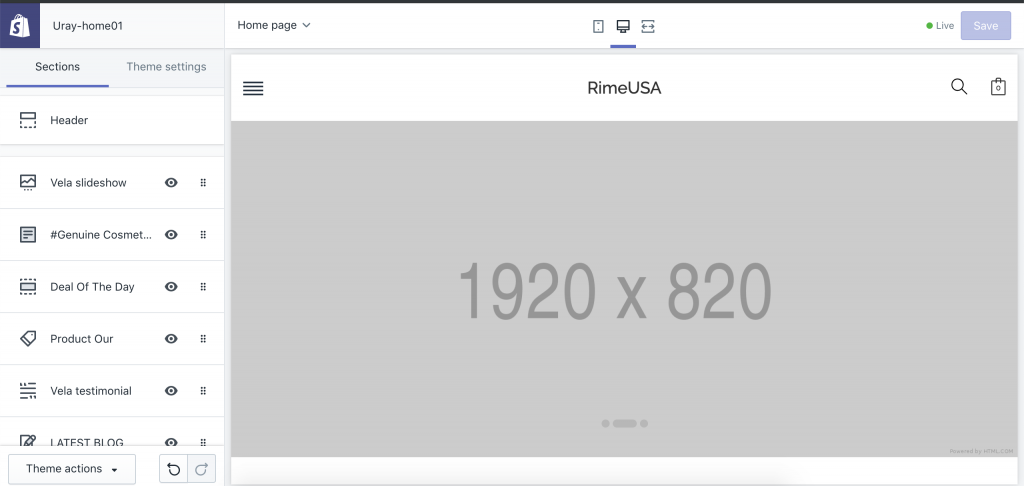
From the themes page, navigate to the top and click on Customize. You’ll see the theme editor page. On the left side menu, you can choose the different design elements that you can edit. If you’re happy with your changes, make sure to click save.
Each theme has different layouts, functions, and elements that can be edited. For most themes, you can edit the menu, logo, what sections are visible or hidden, fonts, colors, images, the product page, and how many items are shown on the front and collection page.
If you want to change parts of the design that can’t be edited via the editor pager, you still have the option to change the theme’s HTML and CSS directly.
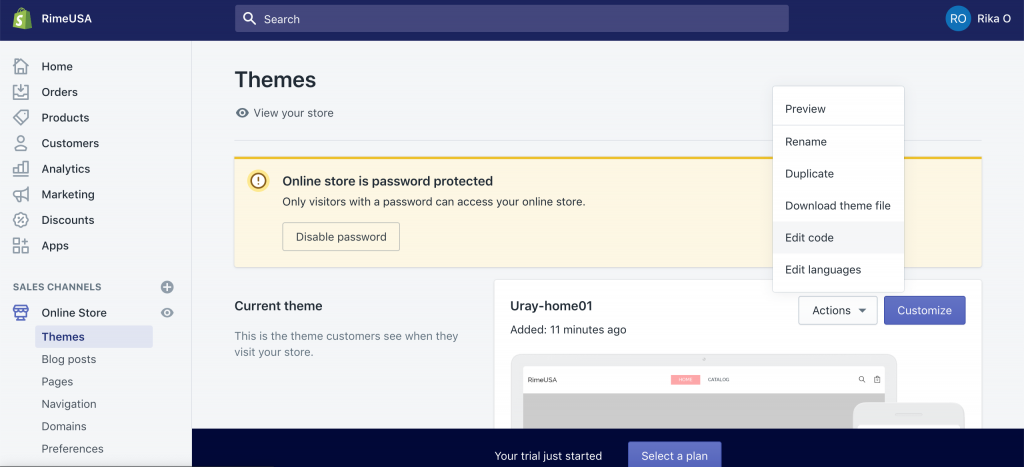
To access the HTML and CSS, go back to the theme page, click actions and edit code. The HTML and CSS are in the liquid files.
Step 3 How to Add a Product
Your store looks great now. The next step is to add your products. From your Shopify home, navigate to the Products tab. Click Add Product. You’ll see the product input page.
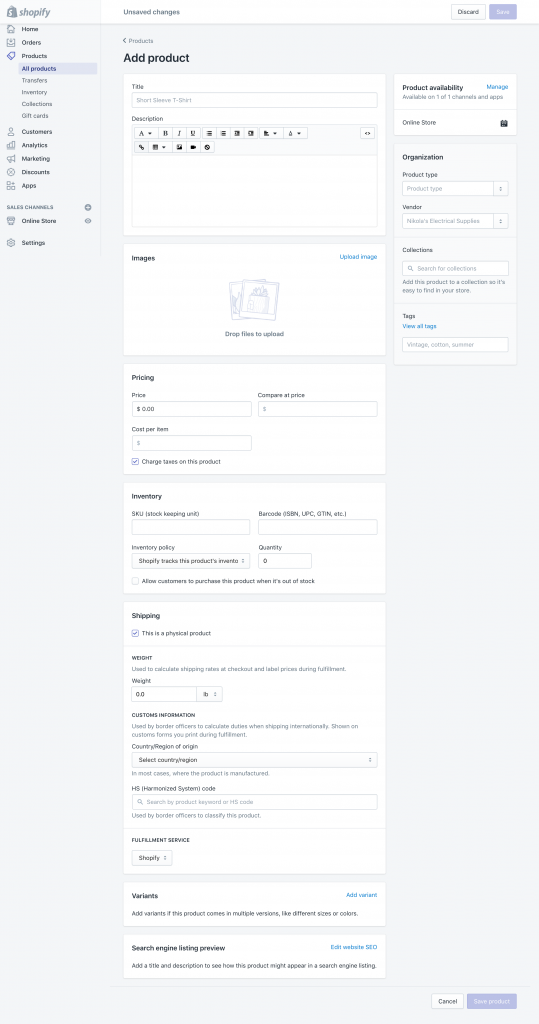
Title
Enter your product’s title. It should be clear for the customer what you’re selling or interesting enough so visitors want to learn more.
Description
What makes a good Shopify product description? You should give your customers all the information they need to make an informed decision. Your customers can’t touch your product so a good description helps to make them understand what they’re buying. Think of it as a little sales pitch. Add the product’s ingredients, materials, how it’s made, specifications, features, and benefits. A good description can also help you with your store’s SEO.
Product Availability
Here you can choose on what sales channels you want to offer the product.
Product Type
Add what kind of product this is. This helps to later organize your products and to sort them into collections.
Vendor
This is where you can give credit to who created the product
Collections
Add your products into collections. You can use these to later sort your products.
Tags
This is another way to organize your products. Maybe your product is a pink bath bomb, the product type could be “bath bomb”, the collection could be “bath” and the tag could be “pink”. Now you can sort by bath bombs, by the collection bath as well as by pink products.
Image
Upload some great pictures of your product. You can upload more than one to show different product angles and details.
Sale price
This is the price you want to sell your product for.
Compare Price At
If you want to show that the product was more expensive before, enter the higher price here.
Cost Per Item
You can enter the actual cost of your product here and see your profit margin.
Taxes
When you’re selling a physical product you most likely have to collect sales tax. Make sure this box is checked. To learn more about taxes, you can check this site from Shopify. Also, talk to an accountant to make sure your taxes are set up correctly.
SKU
A SKU or Stock Keeping Unit is a unique ID for each product. It can be used to track inventory. The number is oftentimes provided by the manufacturer or supplier. If you don’t have one, you can leave it blank
Barcode
If you keep track of your products via Barcodes, you can enter them here.
Inventory Policy
Decide how you want to keep track of your inventory. The “Shopify keeps track of inventory” is the most popular option.
Quantity
How many of this product do you have?
You can also allow customers to buy the product, even if you don’t have them in stock. If you want to offer this option, make sure to check this box.
Shipping
If you’re selling a physical product, check the box.
Weight
Enter how much your product weighs. This is needed to calculate the shipping costs.
You’ll also need to enter customs information if you want to sell internationally. If you just start seeling, only focusing on the US can be easier.
Variants
You can choose to offer more variants of your product, like different sizes or colors.
Search Engine Listing Preview
This is how your product will show in the search engine results. You can edit this info and add your most important keywords.
Step 4 How to Create Collections
You can use collections to organize and filter your products. Collections are also helpful for customers to find what they’re looking for.
Navigate to Products, click Collections and then Create Collection.
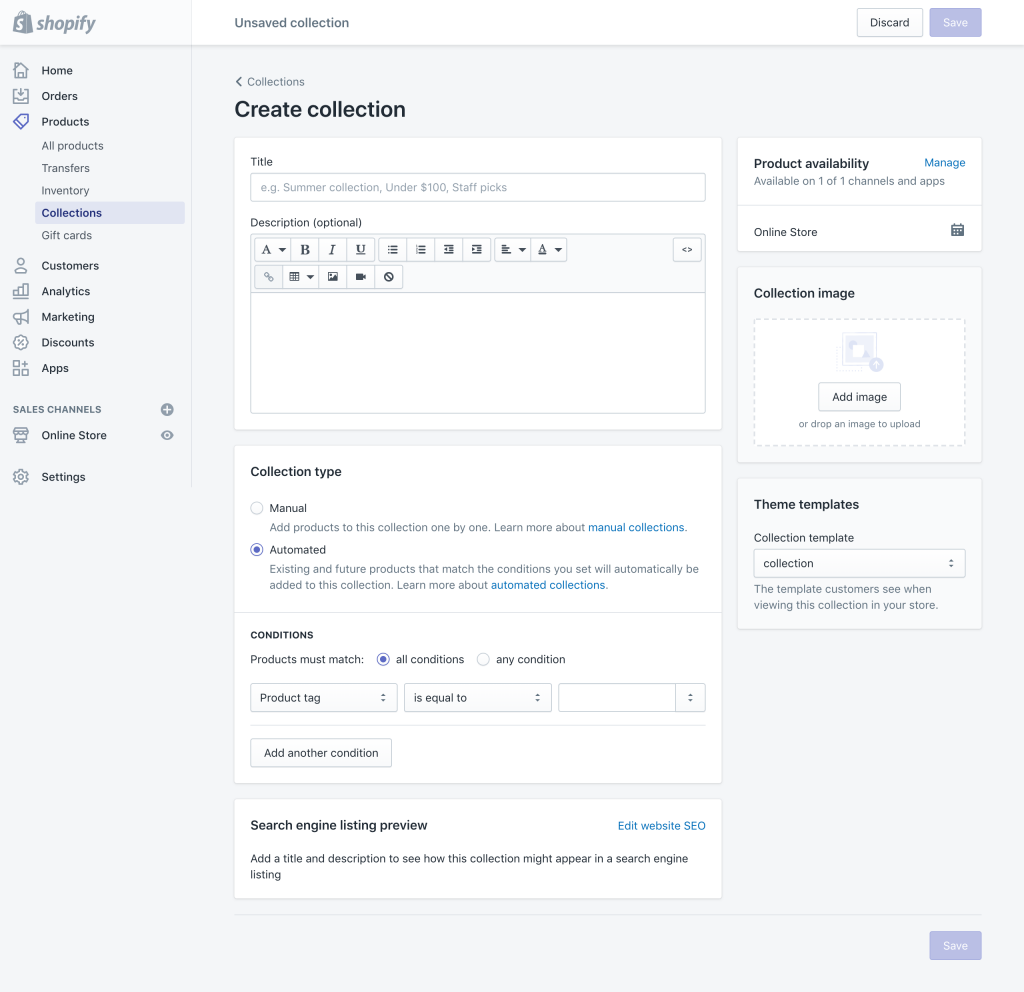
Title
This is the name of the collection. It could be named after a product type, like “bath bombs”, or special offers like “summer specials”.
Description
You can decide to add a description. This usually shows on the top or bottom of the page. It’s an optional step. Some themes don’t show the collection description by default and you might have to add {{ collection.description }} to your collection liquid file. A collection description can help with your SEO.
Product Availability
Decide on what channels you want to show the collection.
Collection Image
Add a nice image that represents the collection.
Collection Type
This is where you choose what products are added to the collection.
You have 2 choices: Either add products manually or add them automatically based on product characteristics. For example, you can add products that are of the same product type or have the same tag. You can add products that match one or more conditions.
Search Engine Listing Preview
If you’d like, you can edit the search engine preview to add more relevant keywords.
How to Add Your Shopify Collection to Your Navigation
Now that you created a collection, how do you add it to your shop’s navigation so customers can see it? Navigate to Online Store and click Navigation.
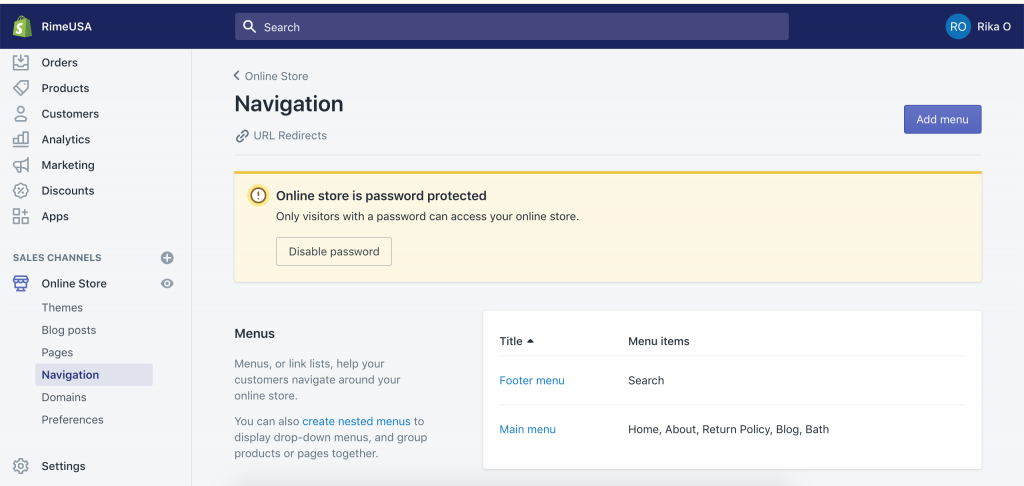
Choose the menu to which you’d like to add the collection. Add a menu item name and choose where it should link to. In this case, it would be the collection.
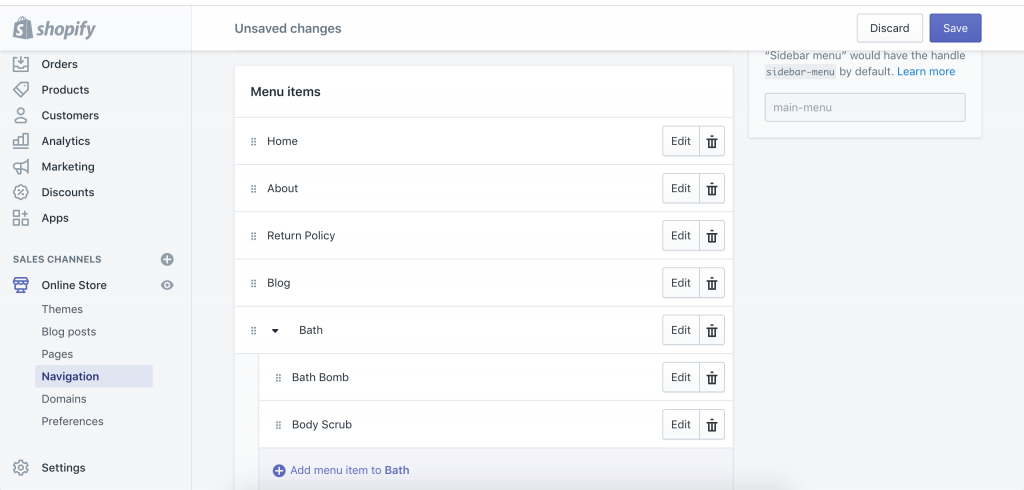
You also have the option to have a collection within a collection. For example, you might have a “Bath” collection. In this collection are the “Bath Bomb” and “Body Scrub” collections.

First, set up all the collections. In this example, it would be the “Bath” collection, “Bath Bomb” collection and “Body Scrub” collection.
Now add all three to your menu. The last step is to drag the two children categories under the parent category. The final menu should look something like this:
Step 5 How to Create Shopify Pages
Pages are permanent elements on your website. Examples of Shopify pages are “Contact”, “About Us” and “Policy” pages. Here’s how you can create your own pages.
Click on Online Store and navigate to Pages.
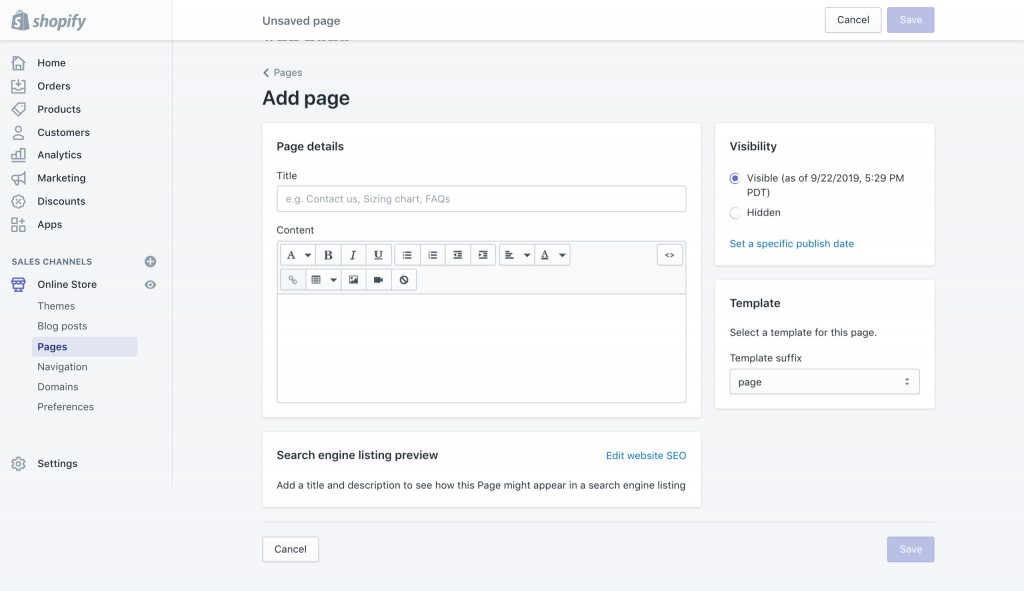
Title
The name of your page.
Content
The content is completely up to you. You can style the text and add images.
Search Engine Listing Preview
This is where you edit what your page looks like in the Search Engine results.
Shopify Policy Templates
You should be transparent about your policies to protect yourself and your customers. Shopify provides templates for a Refund Policy, Privacy Policy, Terms of Service and Shipping Policy.
Go to Settings, click on Legal and choose to Create a Template.
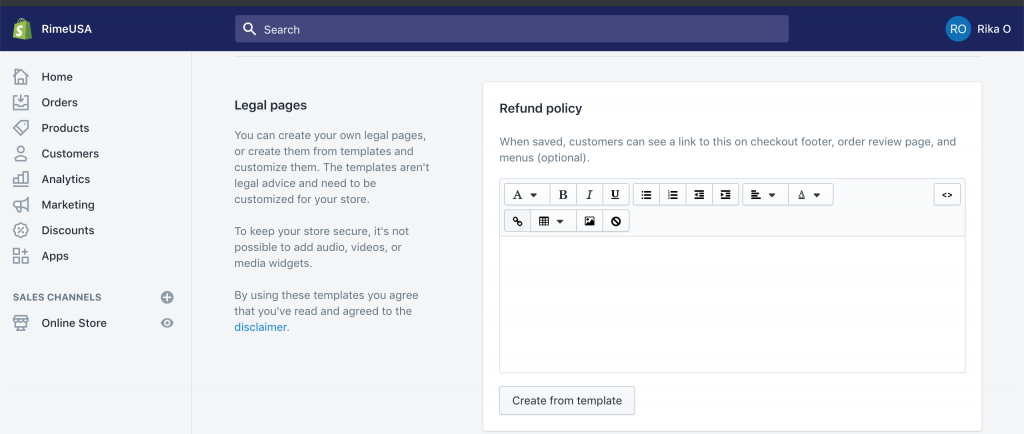
These are automatically generated in the footer of your checkout. You can also copy the templates, make edits and add the Policies somewhere on your shop website, like in the main or footer menu. If you want to make sure your policies are set up correctly, you should take to a lawyer.
Step 6 How to Edit Your Shop Menu
The menu of your new template most likely doesn’t include all the links you’d like to show. Here’s how you can edit your menu.
Navigate to Online Store and click on Navigation. You can edit your menus, like the main or footer menu. Choose the menu you want to edit and click Add an Item.
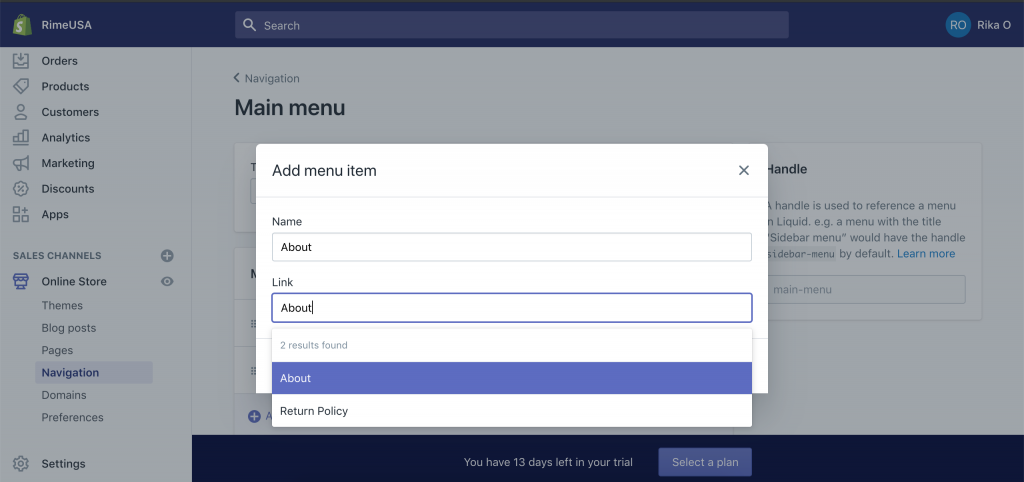
Enter a name for your menu item and choose the link. For example, if you’d like to add your about page name the item About and start typing “About” in the link section. Your about page should show as a link option.
Step 7 How to Accept Payments
In order to start selling, you need to be able to accept payments. This is very easy to do with Shopify. Navigate to Settings and click on Payment Providers.
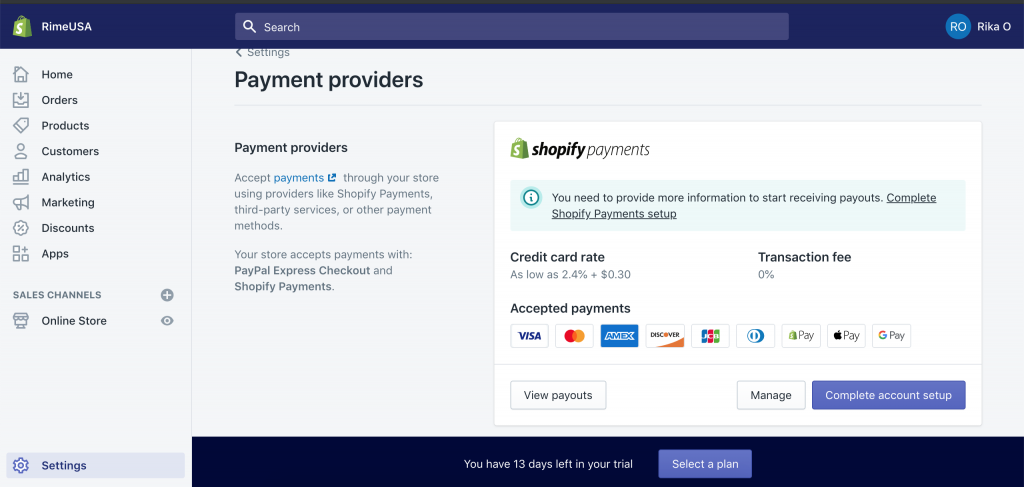
Through Shopify payments, your customers can pay with credit cards. Shopify charges a 2.9% + $0.3 transaction fee. There’s also a 2% transaction fee for payments that aren’t Shopify payments. Click Complete Account Setup and enter your bank account info. In addition to the Shopify payments, I recommend to set up PayPal.
Step 8 How to Set Up Shipping
Setting up shipping is important so you and your customers are charged the right shipping fee.
Navigate to Settings and click Shipping.
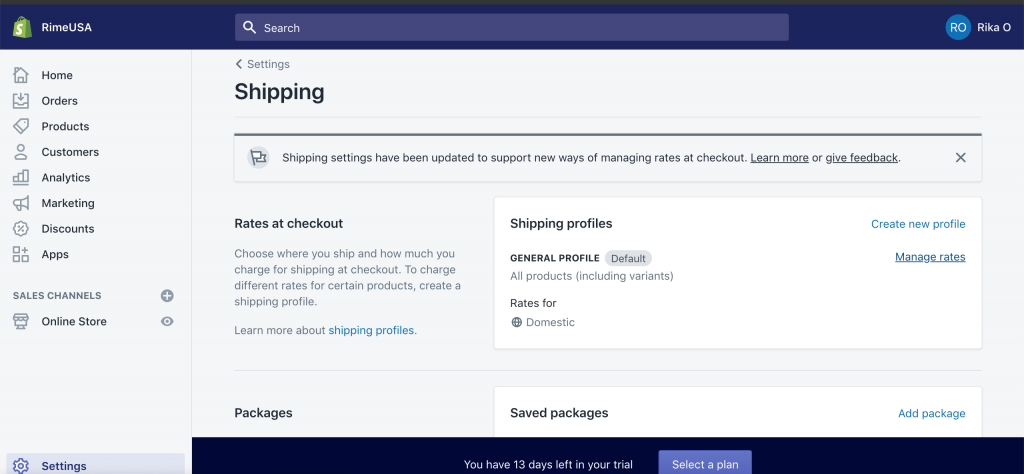
The first thing you need to set up is the shipping rates customers are charged at check out. Click on Manage Rates.
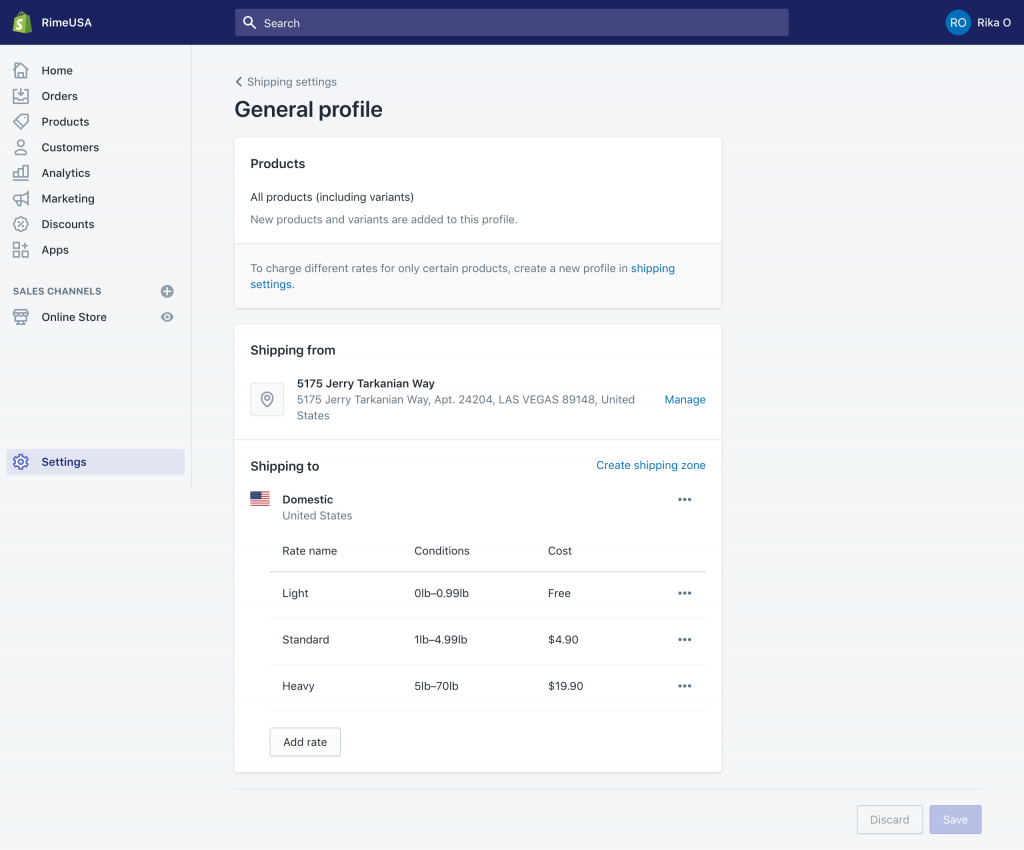
Tell Shopify where you ship from and if all products should be included in this shipping profile. Choose how much you want to charge based on weight, cart amount or shipment speed.
If you have an Advanced Shopify plan, you can also offer calculated shipping rates from USPS, Canada Post, FedEx, and UPS. This means the customer gets charged whatever you get charged.
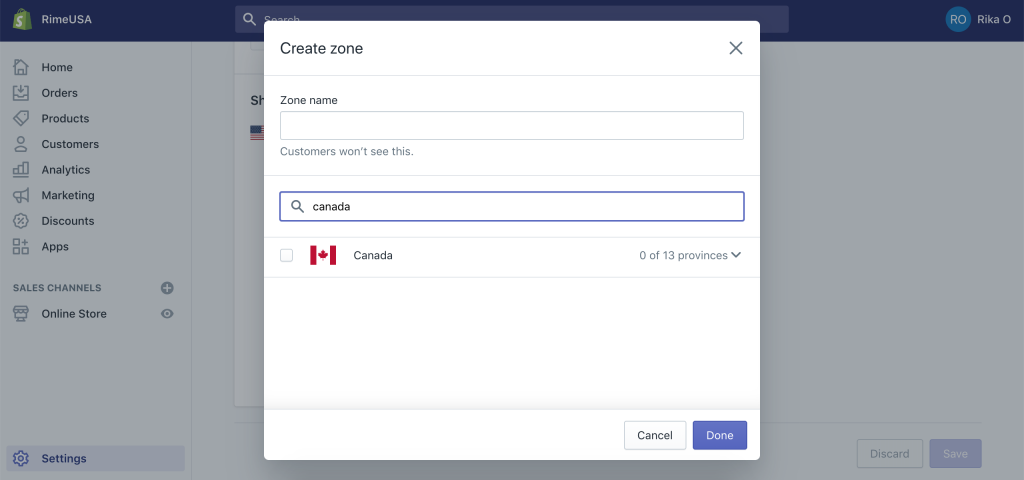
You can also create new profiles for other countries and decide how much you want to charge for these destinations.
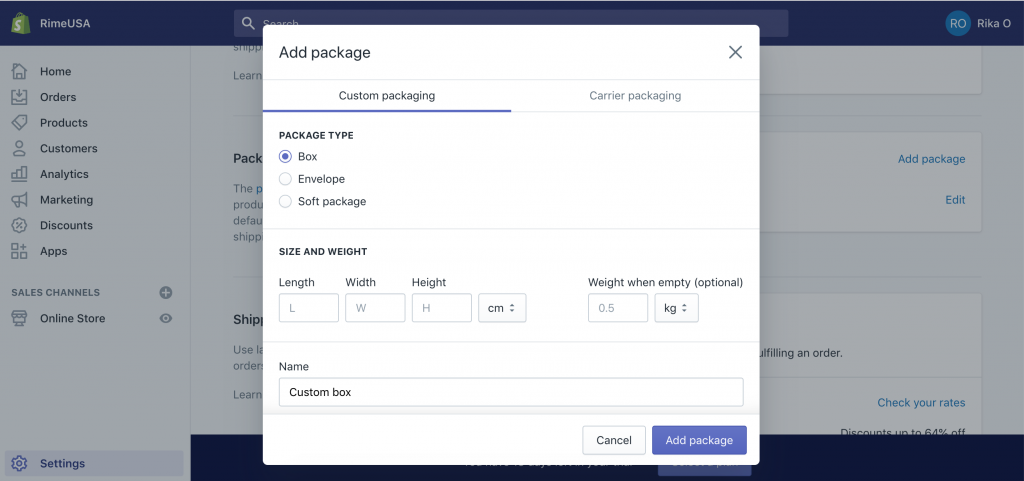
Packages
The next step is to tell Shopify, how you ship your products.
The weight of your packaging will be added to the product weight to calculate the shipping fee.
Shopify Shipping
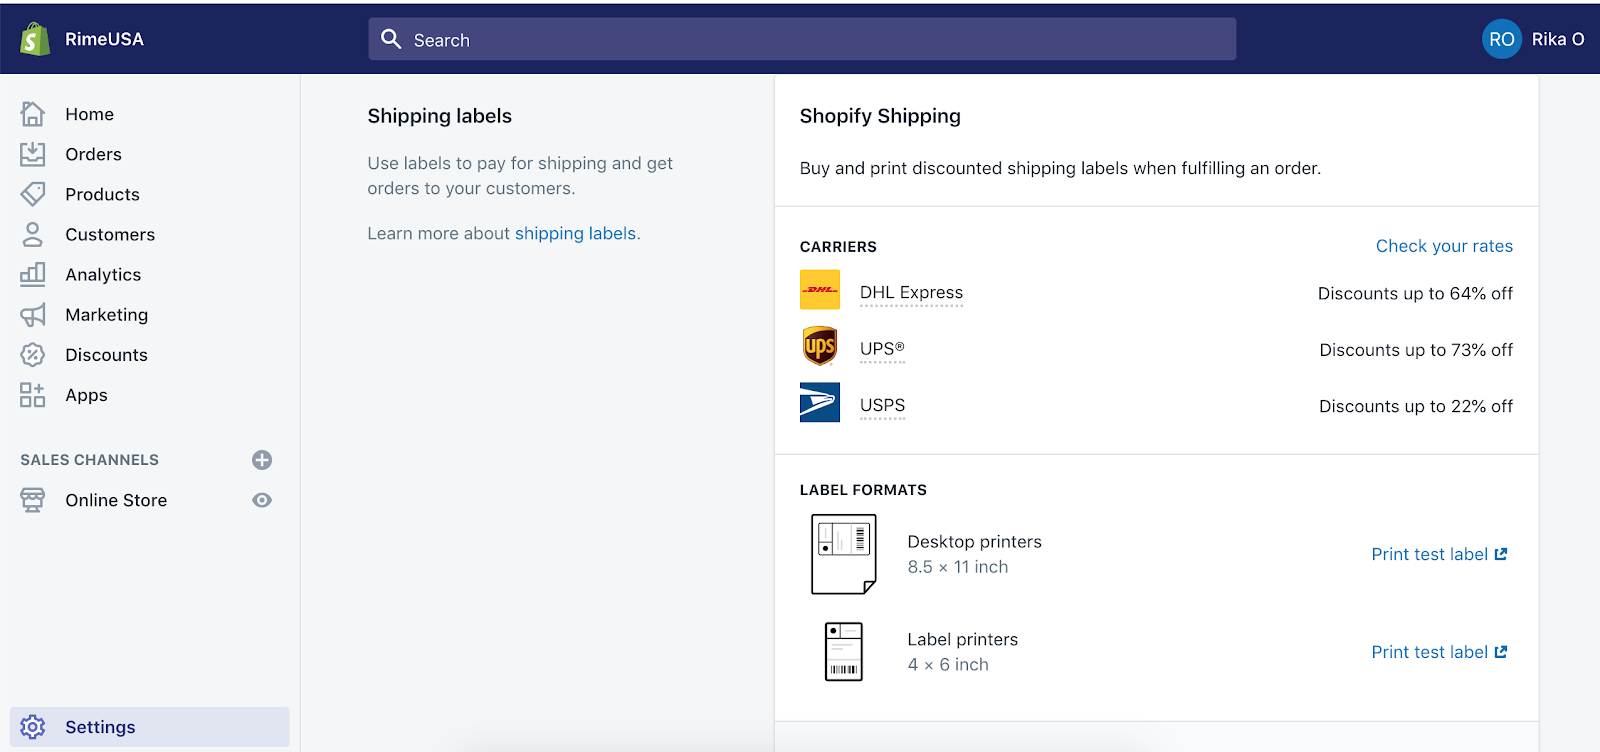
With Shopify Shipping you get discounted rates for USPS, UPS and DHL express if your store is based in the USA.
Packaging Slips
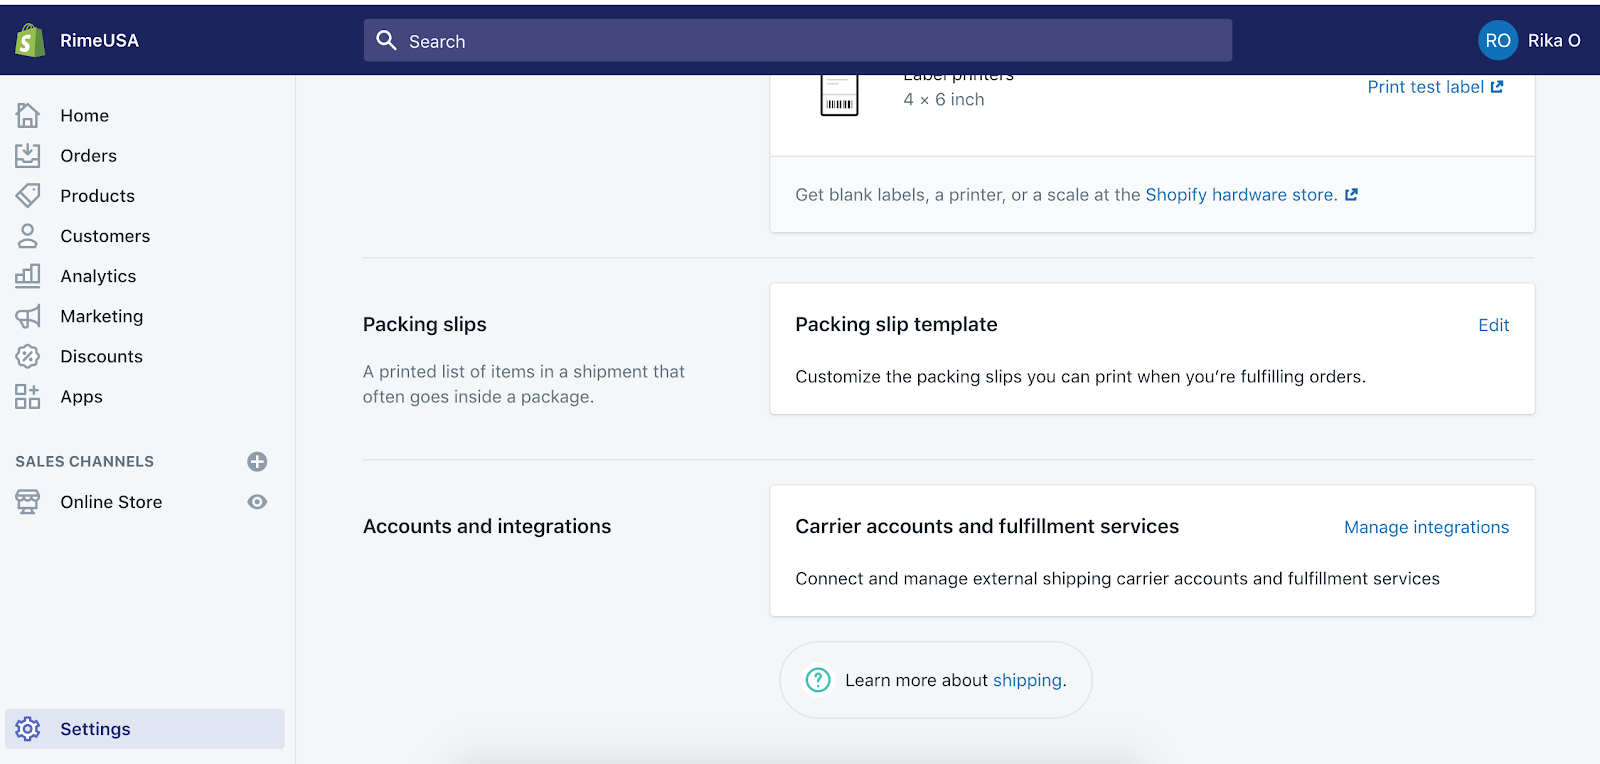
The packaging slip is what goes into your package when you ship your product. You can edit this but there is most likely no need to do this at the beginning.
Accounts and Integrations
If you receive special offers from a carrier, you can add your accounts and integrations here. You might receive better rates from a carrier if you do a certain volume or have a special package size.
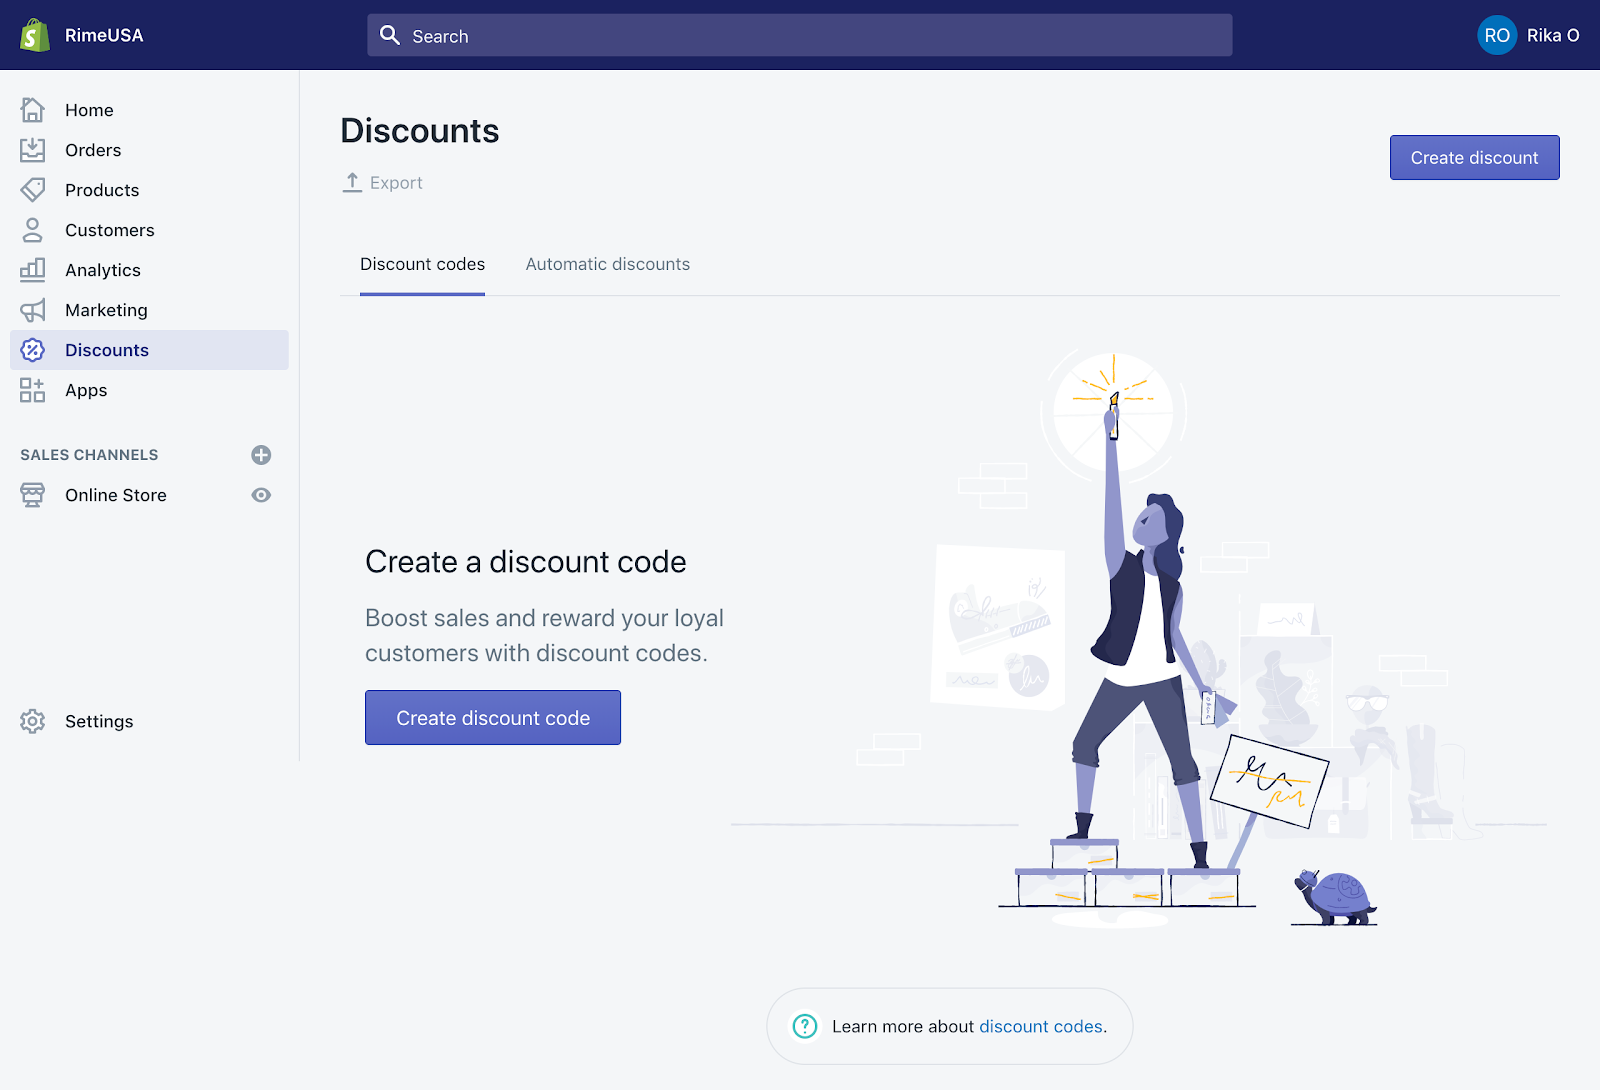
Step 9 How to Create Discounts and Sales
To create a discount or a sale, navigate to Discounts and click Create Discount.
Discount Code:
A discount code customers can apply at checkout. This can be a fixed amount, percentage, free shipping or a “buy x and get y for free” offer.
You can offer a discount code for specific products or collections and require a minimum cart amount. You can also choose usage limits and active dates.
Automated Discounts:
For these discounts, customers don’t need a code. The discount is applied automatically at checkout. Like for discount codes, you can choose different rules.
Step 10 How to Add a Blog
A blog can help with SEO and to bring in free organic traffic. The Shopify blog system isn’t as good as WordPress. However, if you want to mainly run your store and do some blogging on the side, Shopify should be good enough. Navigate to Online Store and click on Blog Posts. Choose Create Blog Post.
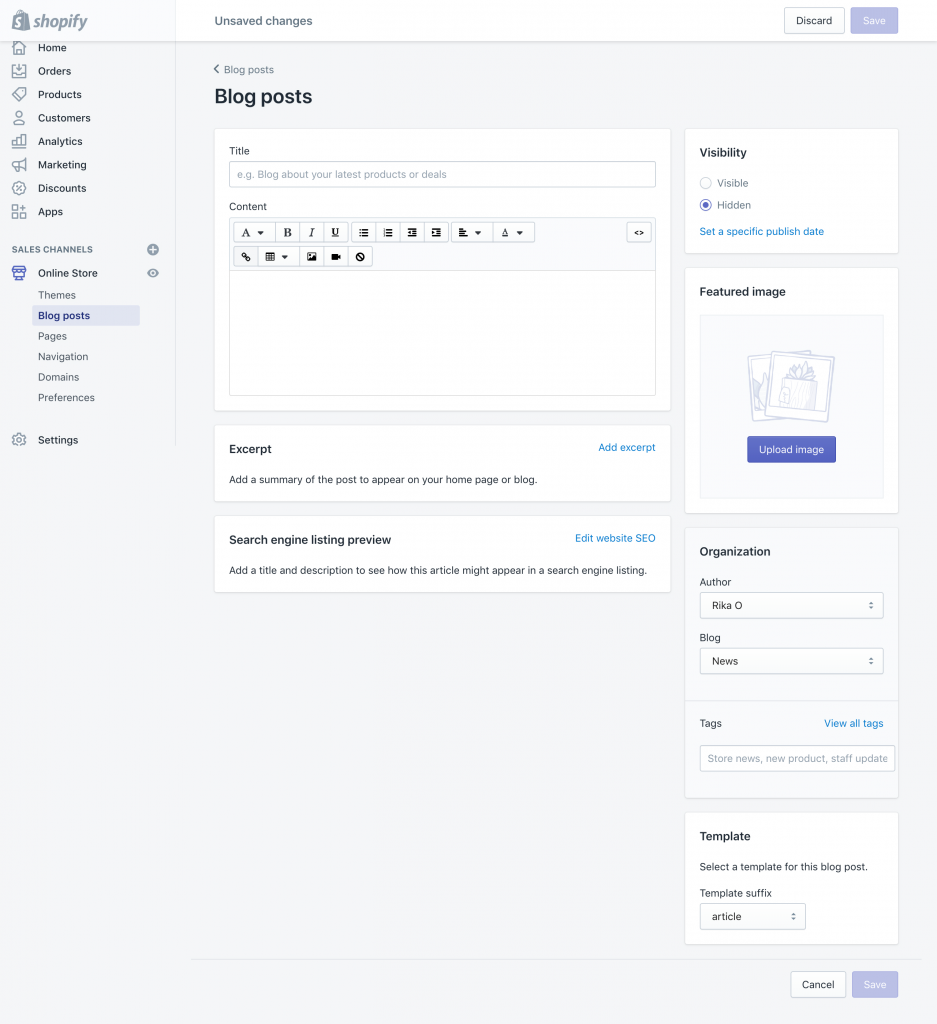
Title
Title of your blog post
Content
The content of your blog post. Shopify offers some text formatting as well as adding different media types.
Excerpt
This is a little piece of the blog article that would show on your blog page.
Search Engine Listing Preview
Here you can edit how your listing appears in the search engine results. You can edit the title and meta description to include relevant keywords.
Visibility
Choose if you want to publish the article right away or on a specific publish date
Feature Image
Upload the featured image for your blog post
Organization
Choose an author and on which blog you’d like to post the blog article.
To see the blog on your website, add the Blog to your menu via your the Navigation tab.
Step 11 How to Add Shopify Apps
Shopify allows you to add apps for extra functionality. There are apps that can help you to be more efficient and to grow your business. Some examples are a live chat and product reviews. To add an app, navigate to Apps.
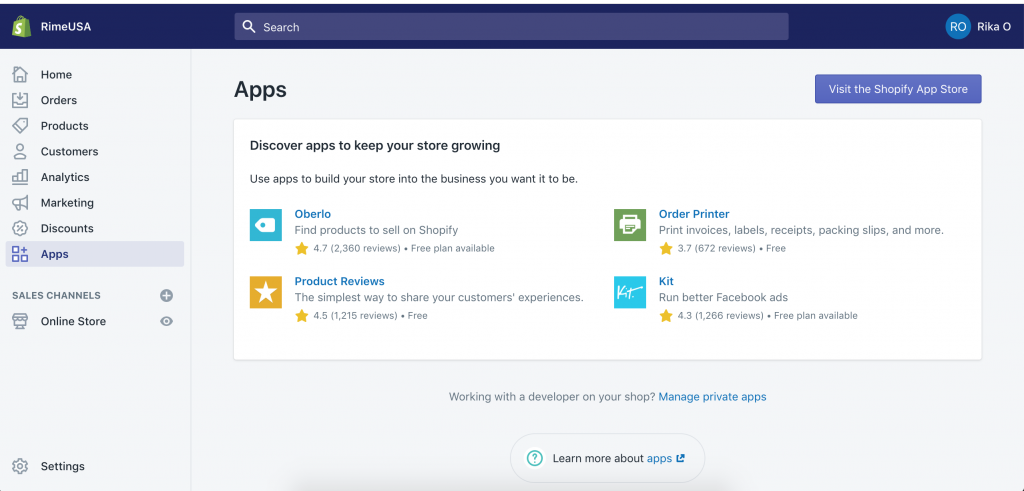
The next step is to go to the Shopify app store to see free and paid apps.
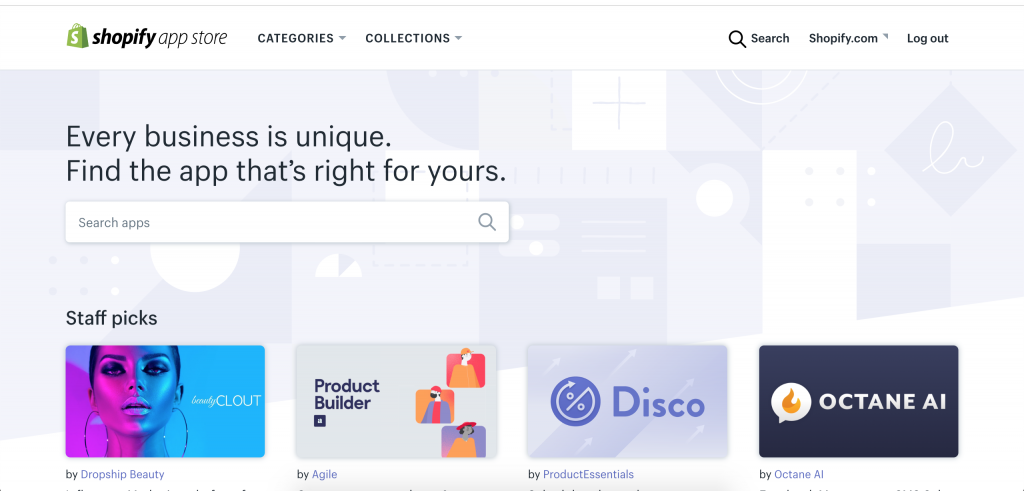
Choose an app you like and click Add App. Shopify informs you what kind of access the app needs. Click on Install App. You’ll then see what other steps you have to take to use the app. There might be a code snippet you need to add to a liquid file. No worries. Shopify walks you through it.
Step 12 How To Add a Custom Domain
Okay, you’re almost ready to make your first sale. One thing you still need to change is the domain name. By default, your current domain as has a myshopify.com extension. While this doesn’t prevent you from opening your store, it doesn’t look very professional.
There are two ways to get a custom domain: Get a domain from Shopify or through a third party.
How to Buy a Domain From Shopify
Navigate to Online Store and click on Domains.
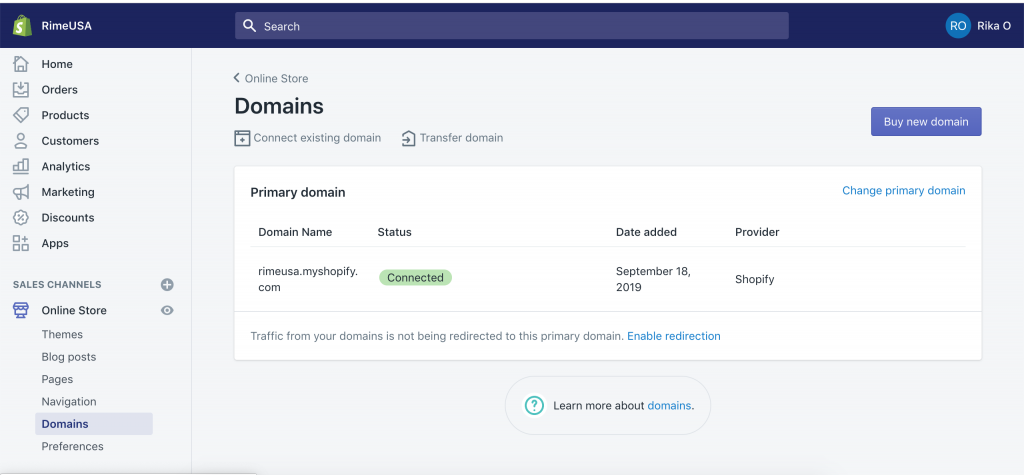
Choose Buy New Domain. The only thing you need to do is to enter your domain idea and see if it’s still available. If it is, you can purchase it.
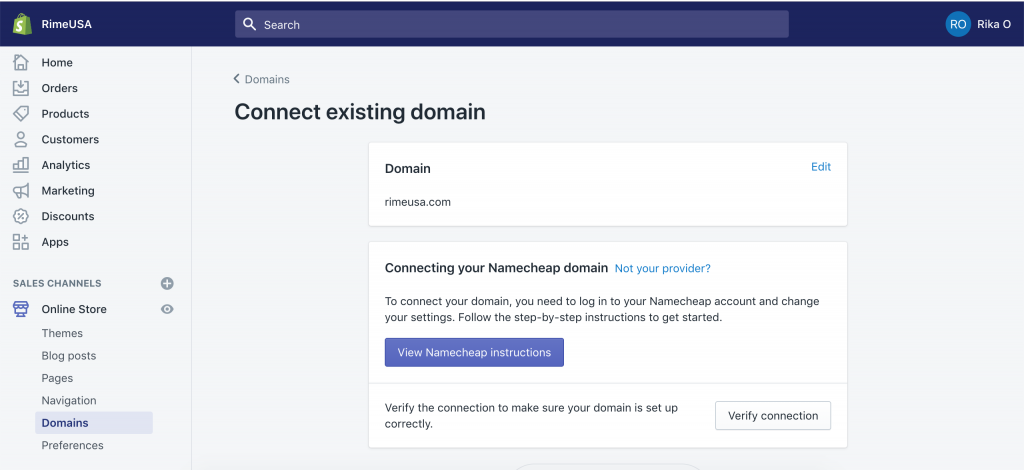
How to Add a Domain From a Third Party
You can also get a domain from a third party like GoDaddy or Namecheap. The domains are usually around $10/year. In order to add your domain, you need to redirect your DNS records. Click on Connect Existing Domain, enter your domain name and follow the Shopify instructions.
Step 13 How to Set Your Shop Live
The last and final steps to start making sales is to remove your store password and to choose a Shopify plan.
How to Remove Shopify Password
By default, your Shopify store is password protected. That means only people that know the password can see your shop. Go to Online Store, Preferences and scroll down to Password Protection.
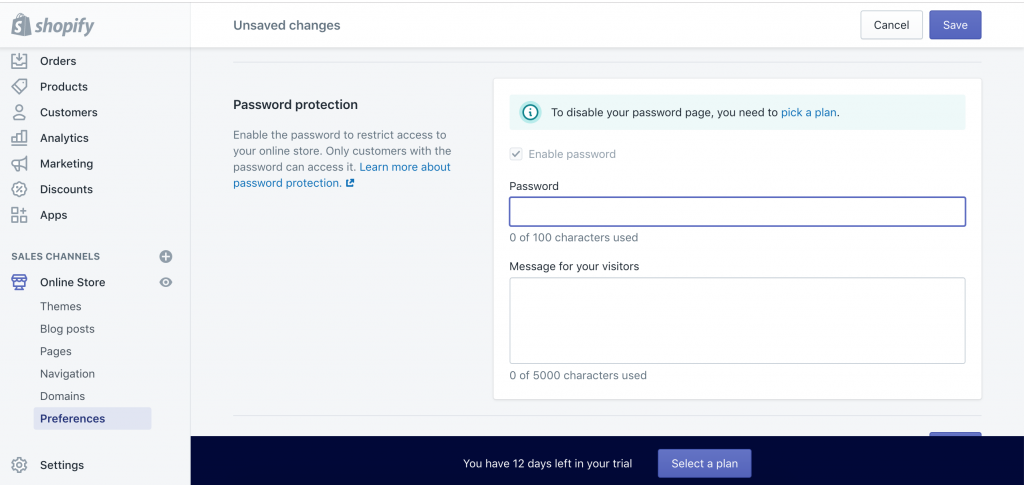
To remove the password, you have to choose a Shopify plan.
What Shopify Plan Should You Choose?
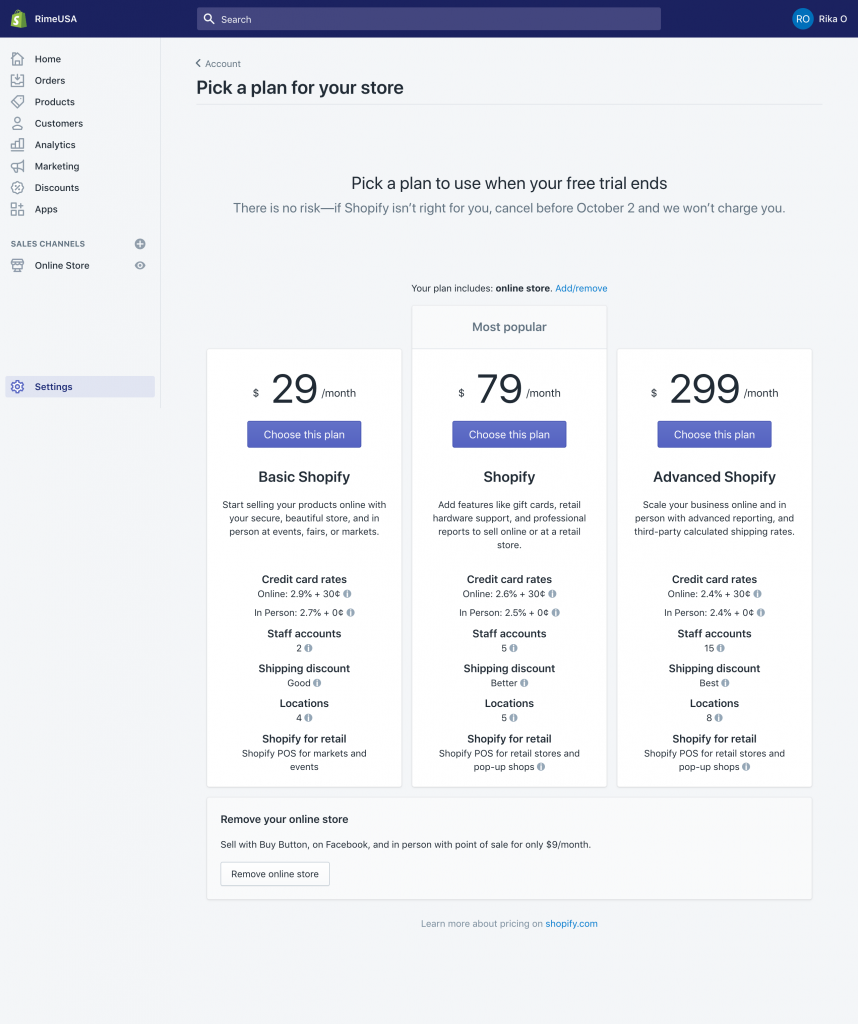
Decide on a plan that is right for your business needs. The more staff accounts and locations you need, the more expensive the plans get. However, you also get benefits like cheaper credit card rates and better shipping discounts. For most eCommerce owners the $29/month basic Shopify plan is good enough to get started.
That’s It!
You’ve done it! Your store is finally ready to go live. You successfully set up your very own Shopify store. The next step is to add all your wonderful products and to bring potential customers to your online shop. Tweak the store’s functionality and its look as you continue to grow your business. Don’t be afraid to try out all the Shopify functions.
Let me know if you have any questions in the comments below or send me an email 🙂